
Hi there! Welcome to today's post. Here is another commission I accepted several days ago. I am glad that people are stumbling upon my Instagram and Facebook Page. Woohoo! I get to meet new people and hopefully I'll become friends with them.
For this particular card, the customer wanted something similar with one of the cards I made before. Remember this?

A former colleague commissioned it for her girlfriend for their first monthsary. You can find the details here.
The color palette for the original card included black, white and gold. The new one had to have black, white and red. Here is what I came up with.


The card measures 4 3/4" x 4 3/4" when closed.
The card measures 4 3/4" x 4 3/4" when closed.
The base is white. I used black board paper for the matting and I utilized the papers from the same paper pad that I used before for the older card. The white part is more pronounced in the previous card while black is more prominent in the new one.


For the belly band, I used the same border punch on a black board paper. Instead of adhering a whole strip of patterned paper onto the band base, I cut two pieces to go the front and to the back. This time, the belly band could be removed and replaced by untying and re-tying the lace at the right side of the band unlike the former that needed to be slid upwards.
I actually made a different band at first, but I didn't quite like it. It felt so off that I decided to create another one. I am happy with how it turned out, but to be honest I had a bit of a hard time with it. I mean I couldn't get the metal embellishment to stick to the die cut. I tried hot glue. It would come off. I tried liquid glue next and it would still come off. I then thought of using glue dots. I put about five of them at the back of the embellishment and the thing held on pretty well. I just hope it would stay adhered onto the paper even after the customer gives it to the recipient. [Fingers crossed.]


When you open the card, it would show a white blank die cut in the middle whose border is doted with red crystals. This would be where the message will be written. I stamped a little image at the top.
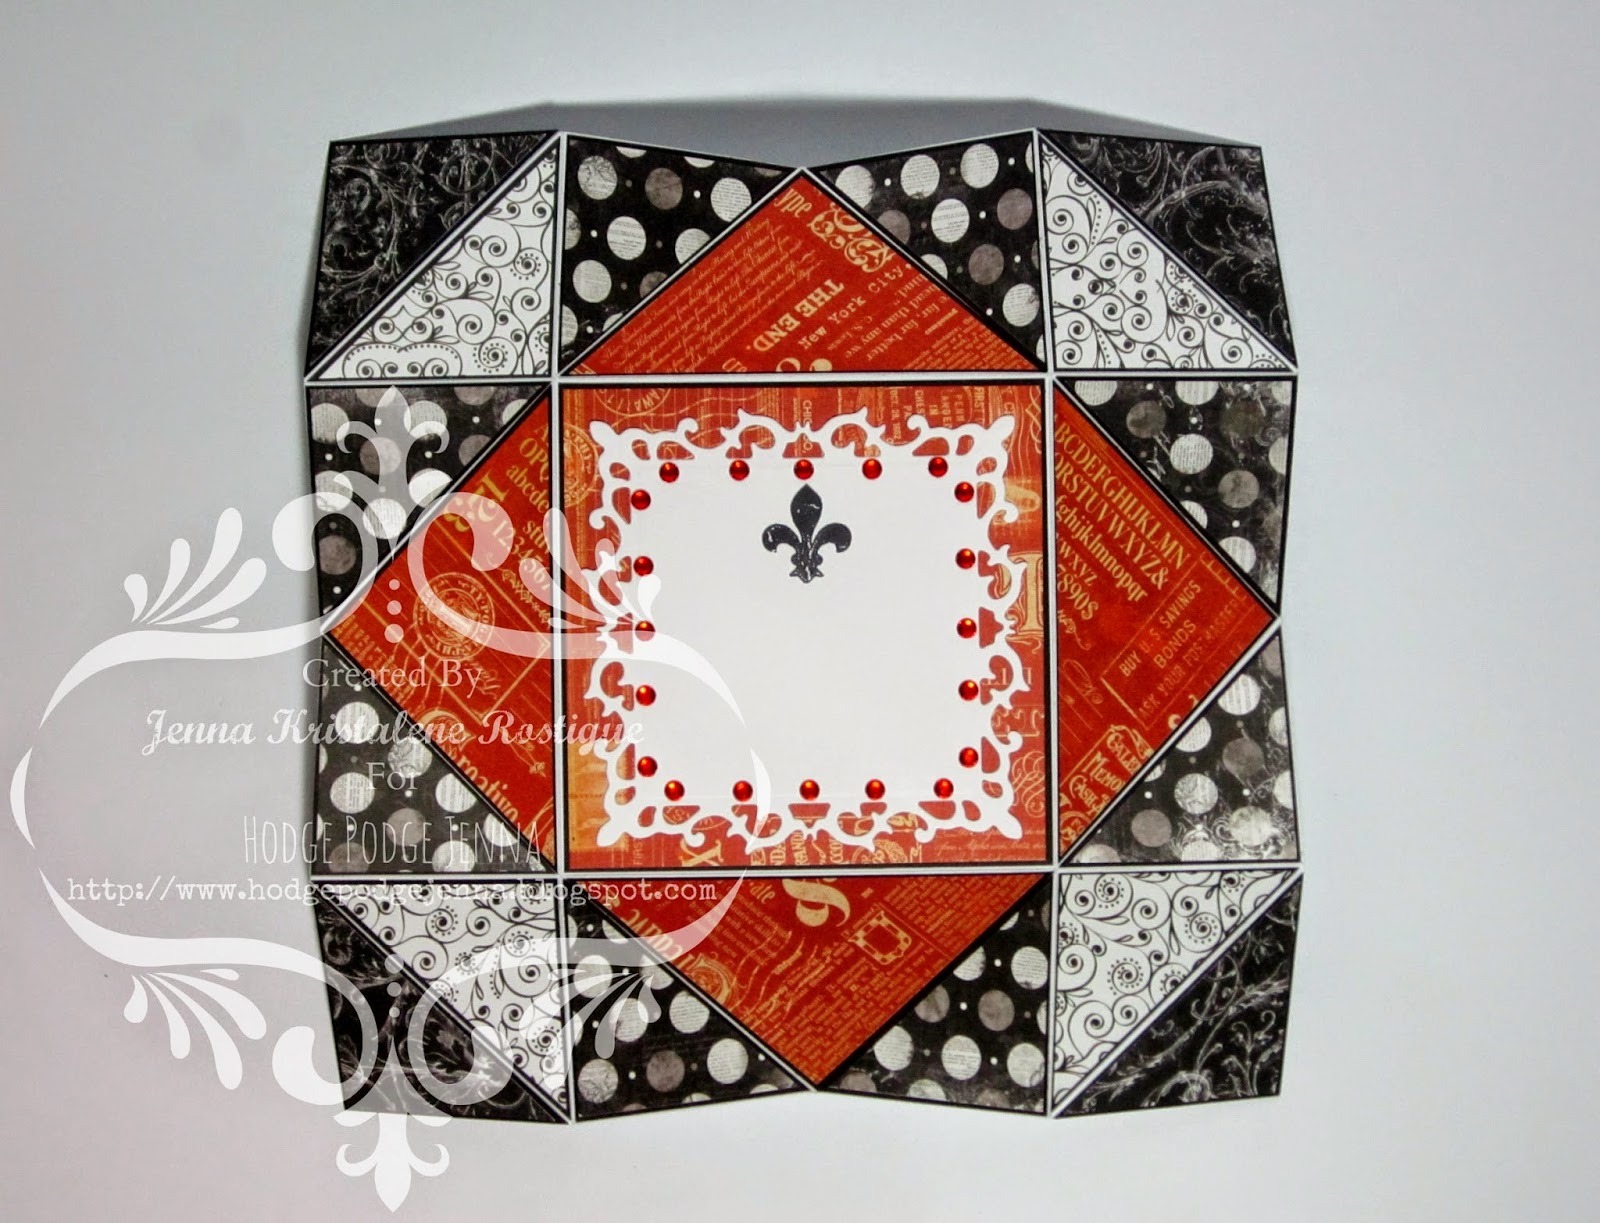
Since red was a must in the project, I used a red vintage paper from the Graphic 45 Typography Collection. I no longer added pearls nor crystals on the outer flaps. I thought the papers were enough.


I made a matching box for the card. I decorated the sides of the lid as well as the sides of the bottom. I printed the recipient's name on white cardstock and ran it through my Cuttlebug to make a tag. I tied a length of red baker's twine as a finishing touch. There you have it. Another Napkin Fold Card.
Thank you for looking. Have a wonderful day!
MATERIALS AND TOOLS USED: Orange Poster Paper White, Bevania Splendorgel White Board Paper, Rives Tradition Board Paper Black and Red, Bo Bunny 6x6 paper pad Enchanted Collection, Graphic 45 8x8 paper pad Typography Collection and French Country, All About Scrapbooking 6x6 paper pad It's All About Love, lace trimming, baker's twine, self-adhesive crystals, metal embellishment, Bo Bunny Clear Stamps Botanical Odyssey, Ranger Archival Ink Jet Black, Marth Stewart Border Edge Punch Arch Lattice, Martha Stewart Scoring Board, Spellbinders Nestabilities Fleur De Lis Squares and Labels Thirty-Five, Cuttlebug Machine V2

No comments:
Post a Comment